Android Things is both a hardware and software solution. The platform supports the following production SoMs: NXP i.MX8M, Qualcomm SDA212, Qualcomm SDA624, and MediaTek MT8516. Also on the hardware side, two Starter Kits are offered for learning and development purposes. These kits are based on the Raspberry Pi 3 and NXP Pico i.MX7D. But of course, you are able to flash the Android Things distribution onto any RPi 3. So we chose this approach.
On the software side, the platform puts the whole of Android 8.1 at your disposal; but the IoT version of this OS has a lot of differences from the canonical one. It was adapted to run on devices having much less performance compared to standard Android devices (phones and tablets). It has no home screen, settings, or other default apps. The user can only set up a network, check for updates, and restart the board. On the other hand, the Development mode is enabled and the device is ready for your experiments.
Developers can create Things applications like normal Android apps via Android Studio. The API has been extended with a facility to work with a variety of peripherals, like GPIO, SPI, and so on. Abilities have also been added to create your own user-space drivers, manage the update process, and communicate with devices via Bluetooth and Low-Power Wireless Personal Area Network (LoWPAN). But to use the last of these, you have to connect an OpenThread Network Co-Processor (NCP) like the nRF52840-PDK.
Another thing that distinguishes Google’s platform from all others is that you do not need to worry about OS updates, software delivery, and all related problems – at least that’s what Google says. But we will consider this later. Therefore, we recommend our Android app development services, which play a crucial role, offering tailored solutions that seamlessly adapt to these evolving platform dynamics.
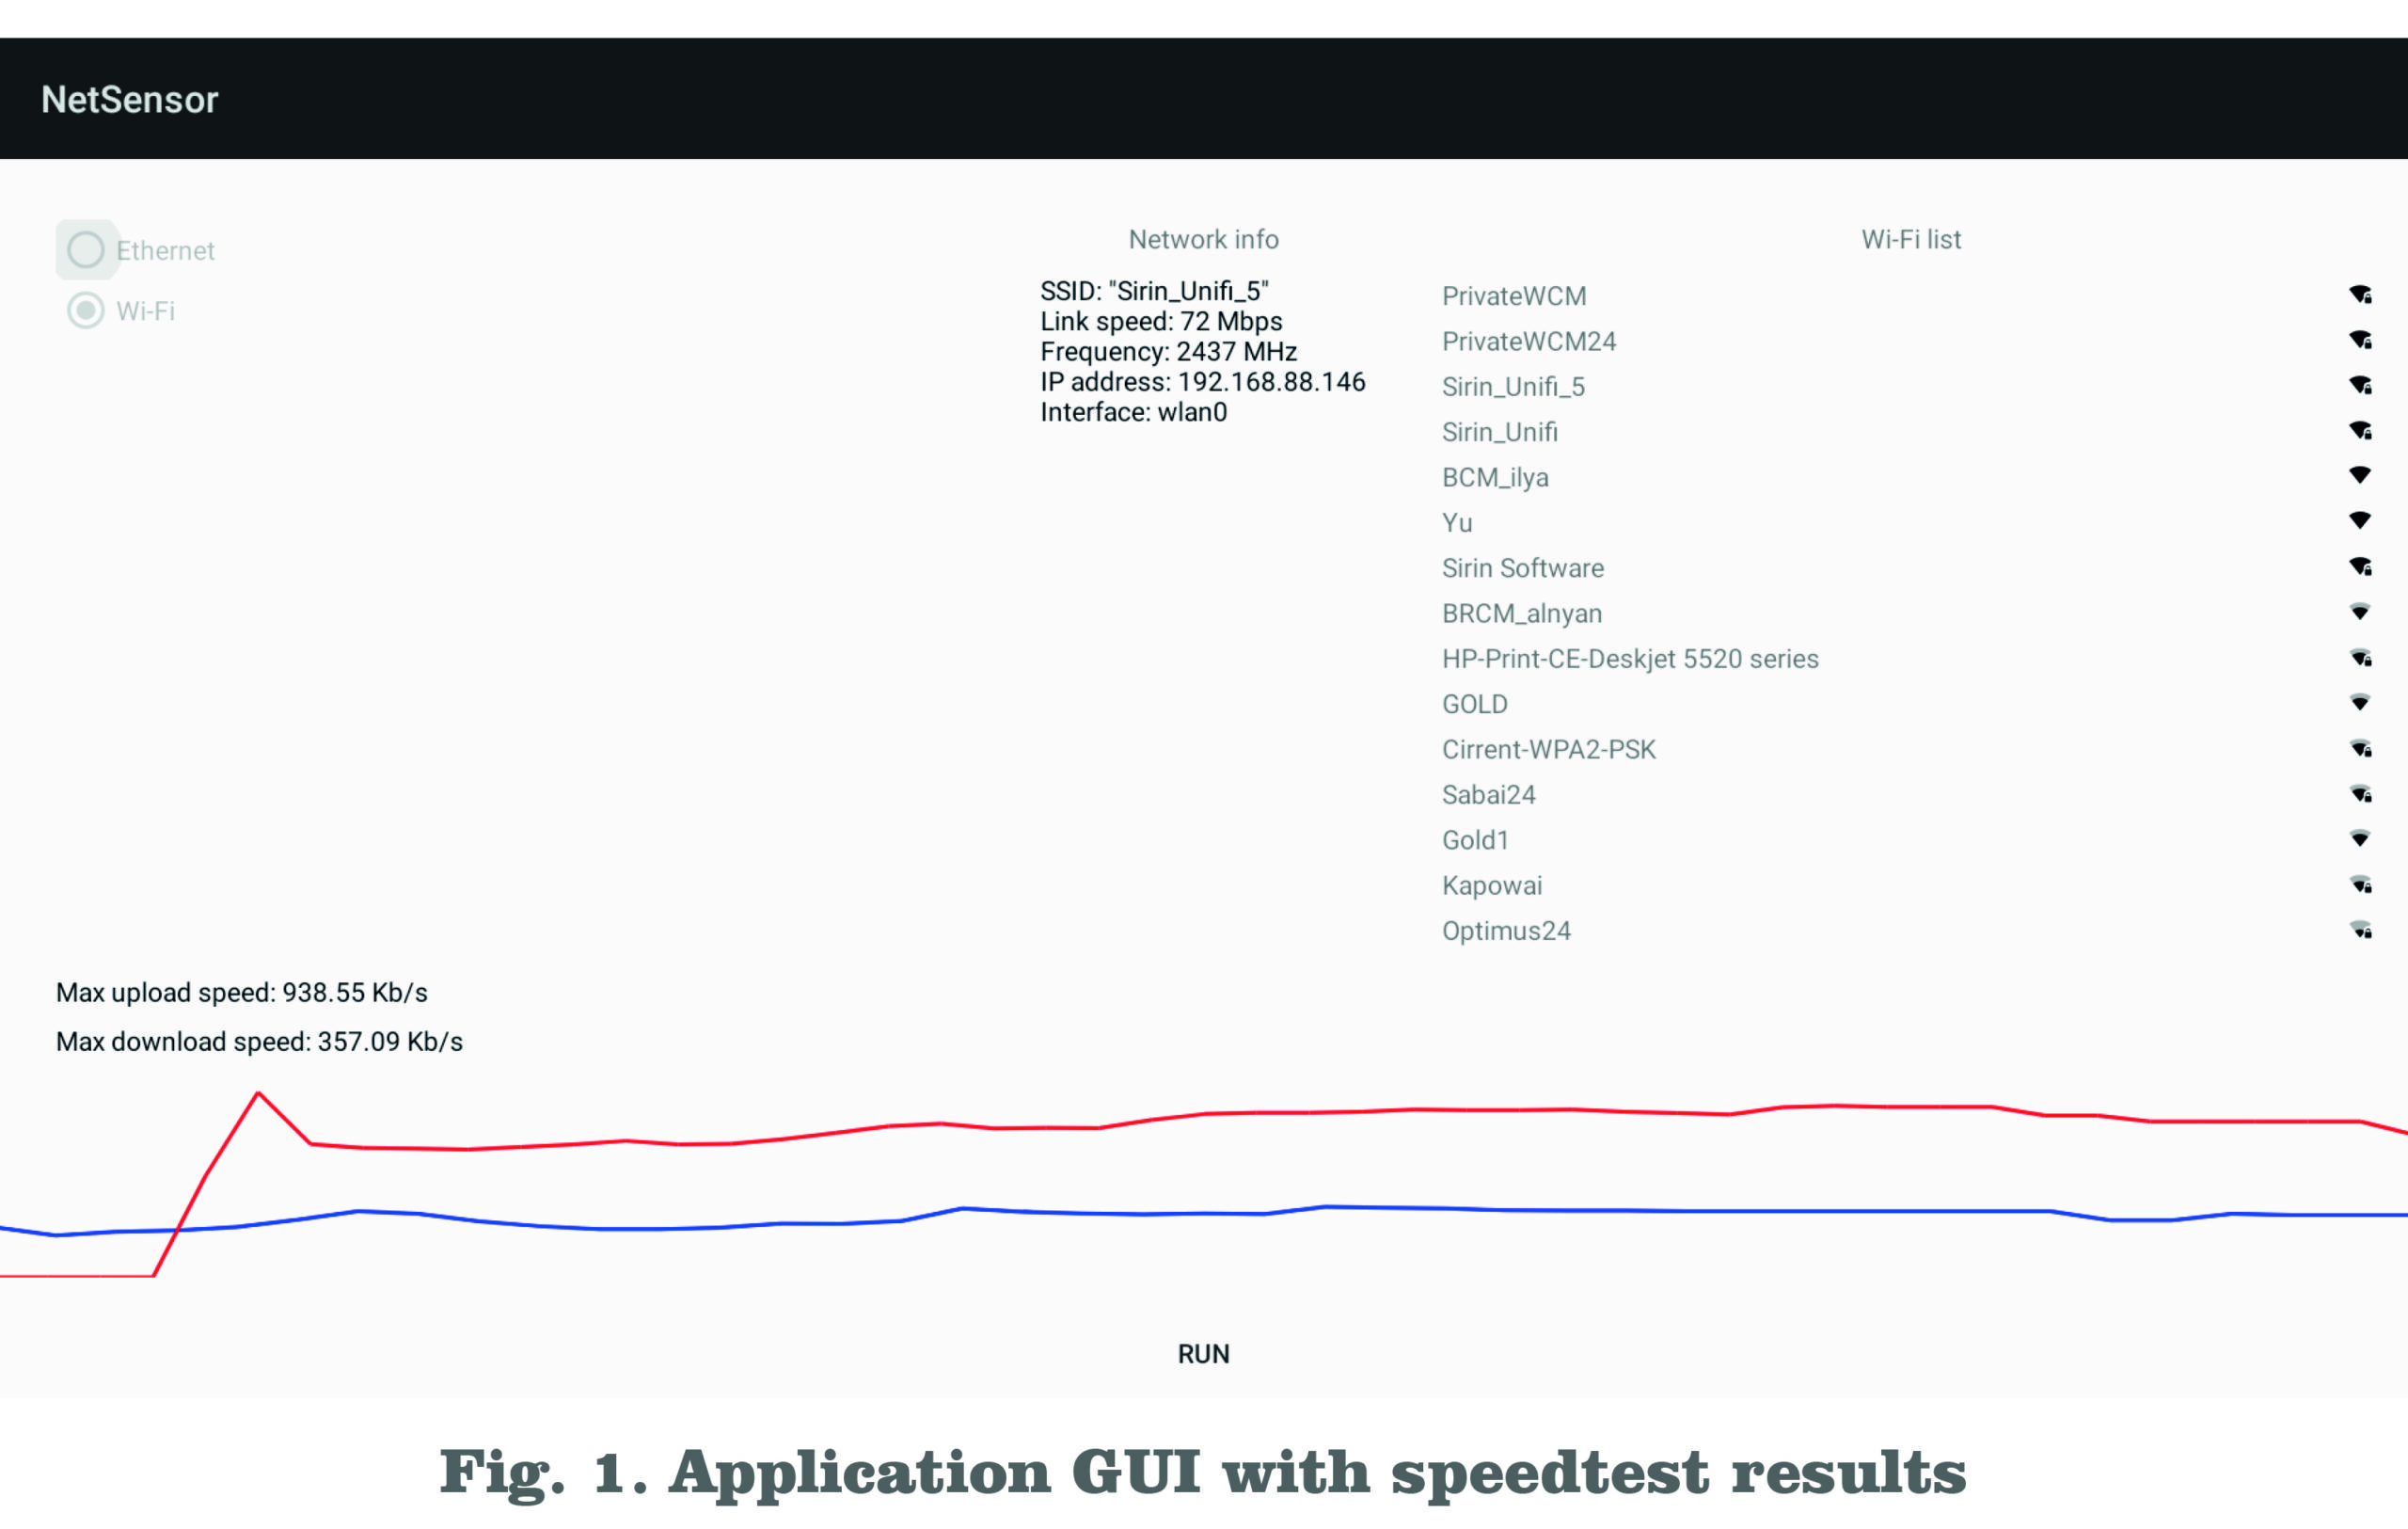
We decided to create a simple speedtest application that will be able to switch between Wi-Fi networks and Ethernet and measure both upload and download speed. This task allowed us to test the complete process flow from code writing and debugging to end-user delivery.
Speedtest Application


During the coding process, we discovered that sometimes Android lacks the API to communicate with hardware (for example, disabling/enabling network interfaces or selecting preferred connections), but all these problems can be solved easily by invoking appropriate shell commands. On the other hand, Android Studio significantly simplifies the debugging and testing process, and the Kotlin language makes coding easy and enjoyable.
But the most interesting aspect of the system is the deployment process. In just a few mouse clicks, you can create a firmware build that includes your APK and deploys it on as many products as you wish. Android Things Console brings a really new vision in embedded software updates delivery.

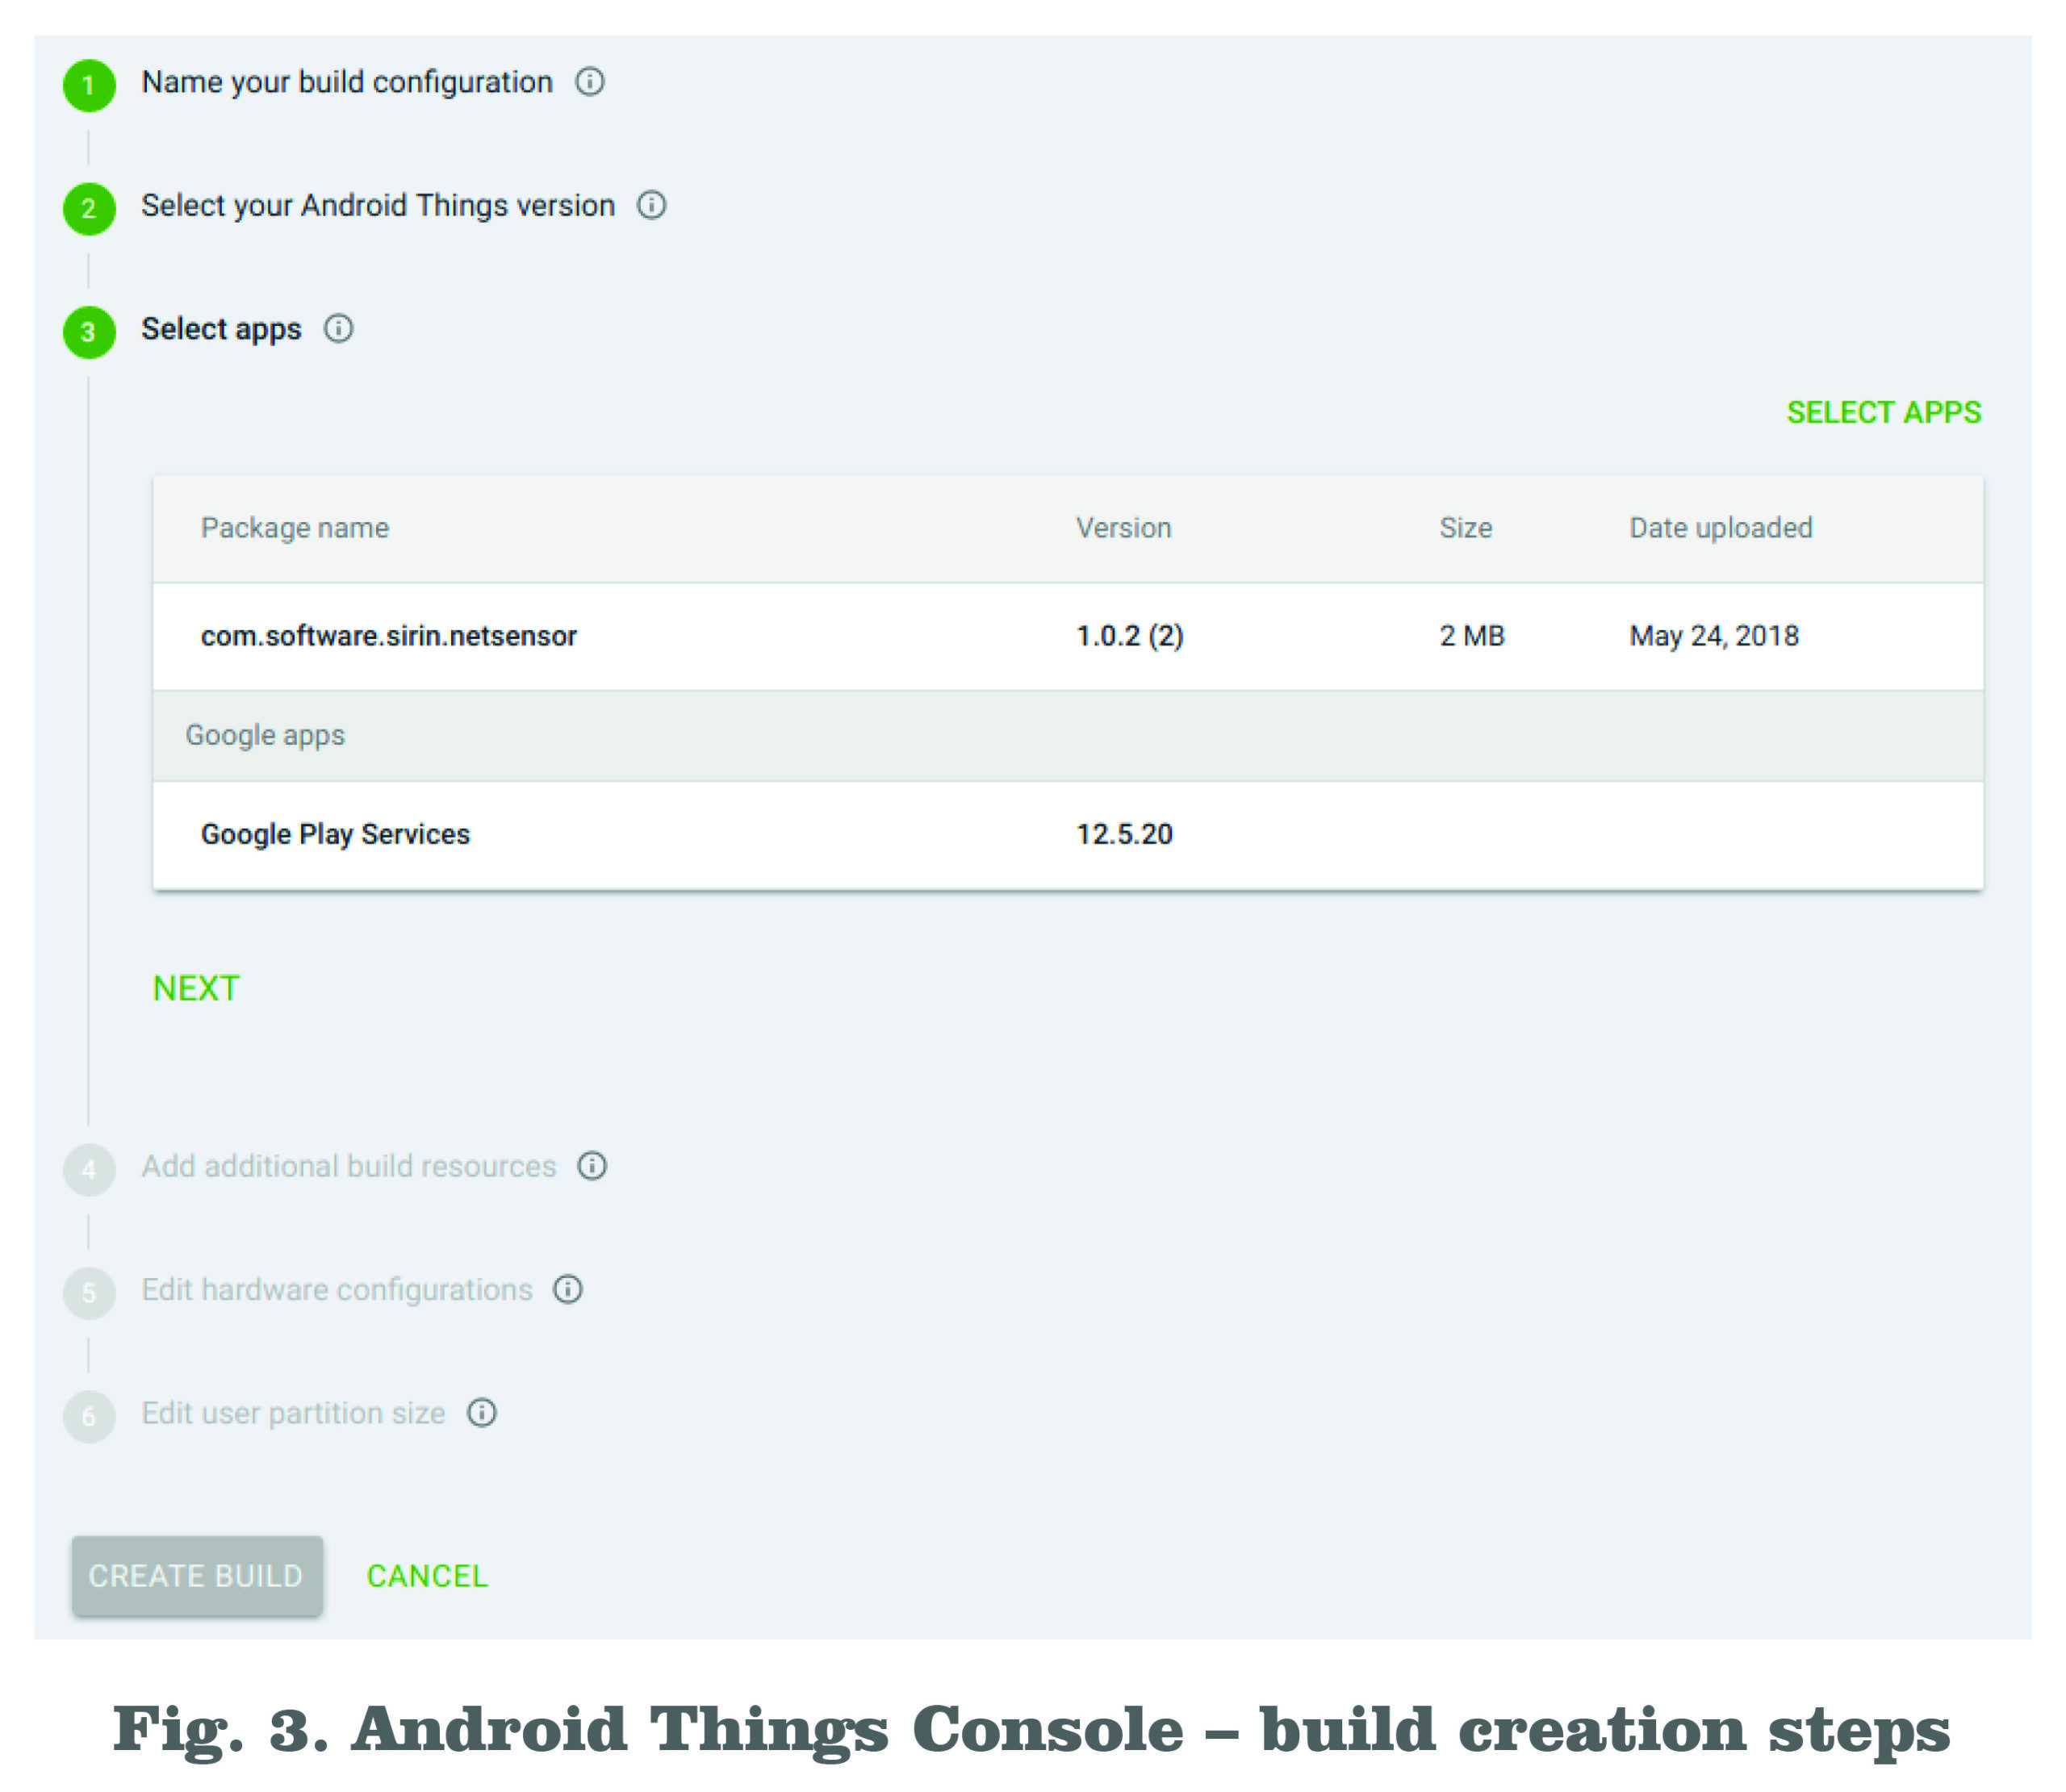
The common build creation process is as follows:
- Name your build
- Select the underlying Android firmware version
- Upload and select your application
- Customize build resources. For now – only boot animation
- Manage peripherals
- Select partition size
Steps 4–5 are optional and used for advanced setup.
When the build has been created, you can download it and flash it to your device, or distribute it to end-users. Flashing is done via the Setup utility from the Console, where you can select a custom image instead of the default one. This utility writes an image onto a MicroSD card connected to the computer. But be aware that if you download and flash a Production image onto your device, you will lose the ability to debug applications and access the ADB shell on it. After creating a first build, you will be able to update flashed devices using just this Console. Updates are created as regular builds and assigned to one of the distribution channels. Then the OTA update process is fully managed by Google’s platform. On the firmware side, the developer can track and configure the update schedule. Android Things uses a seamless update technique: this means that the device’s drive is divided into two identical partitions where one holds the current (running) firmware, and the update is installed onto another partition transparently without interrupting the running system. When the update is finished and the device is rebooted, the bootloader tries to pass control to the new firmware. If it fails, the old code is loaded and the procedure can be repeated.
Sirin Software stays up-to-date on the latest research and technology. If you have any questions, our R&D team is always online – contact us!

